
To provide your product data for the ValveSelect product finding and configuration system there are three features on hand.
- Using the Excel Uploader add-in for preparing your product data and uploading the same directly from within MS Excel.
- Prepare an Excel or CSV-table and upload it to ValveSelect using the ValveSelect bulk importer.
- Leverage the ValveSelect product-API for adding, updating and deleting products.
This post will cover the usage of the Excel Uploader add-in. Please click on the individual images to get an enlarged view.
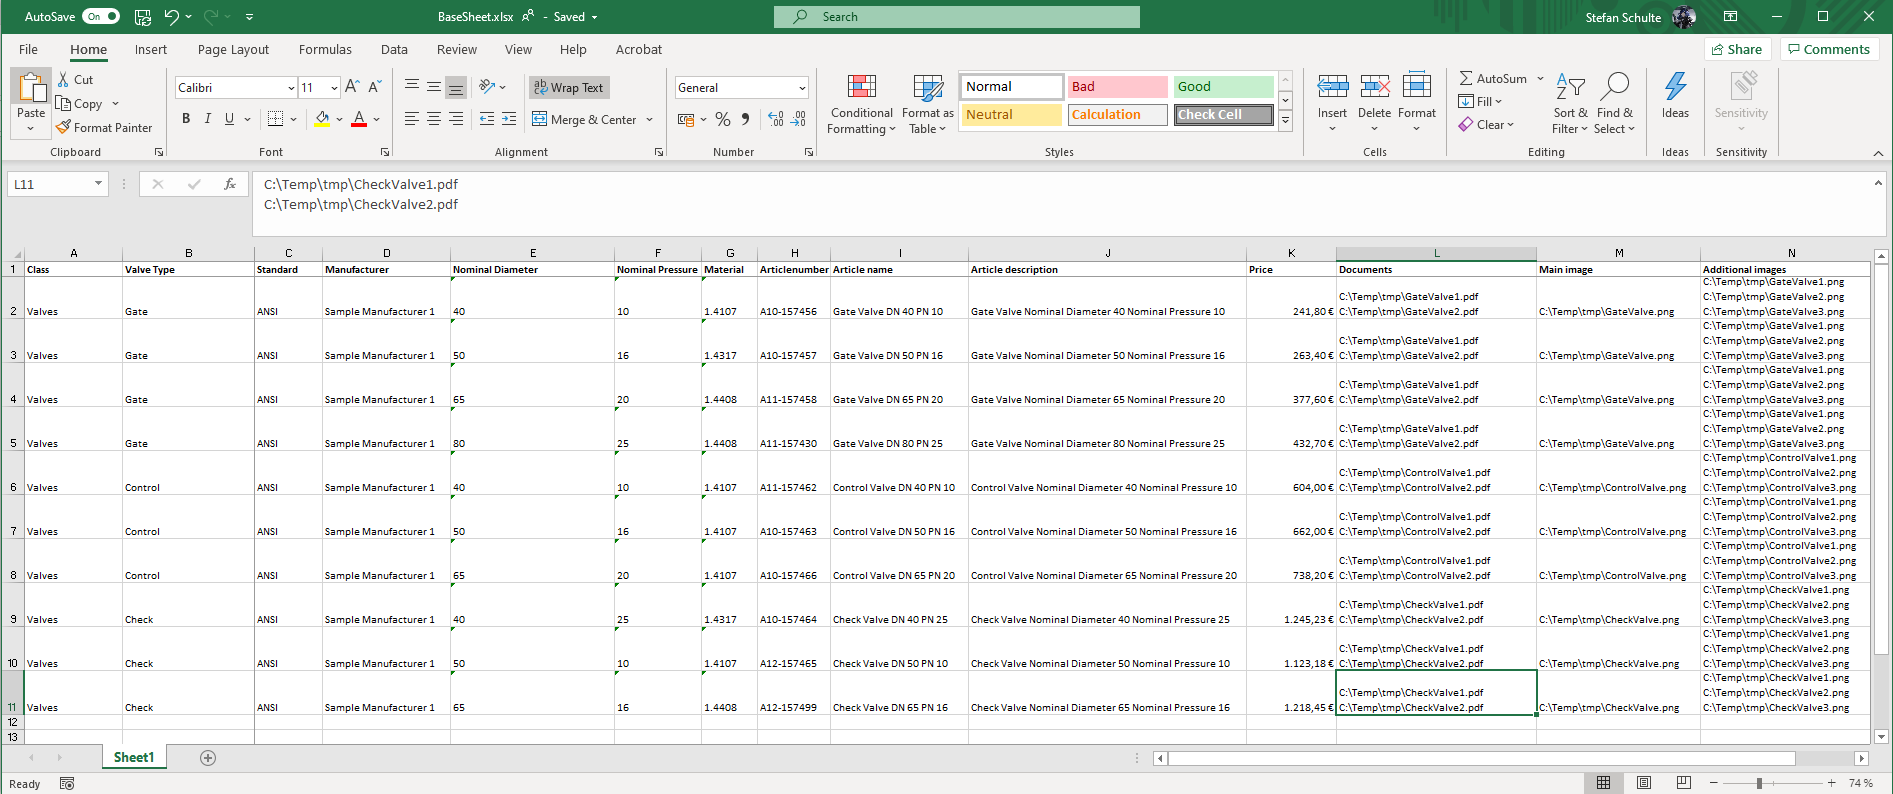
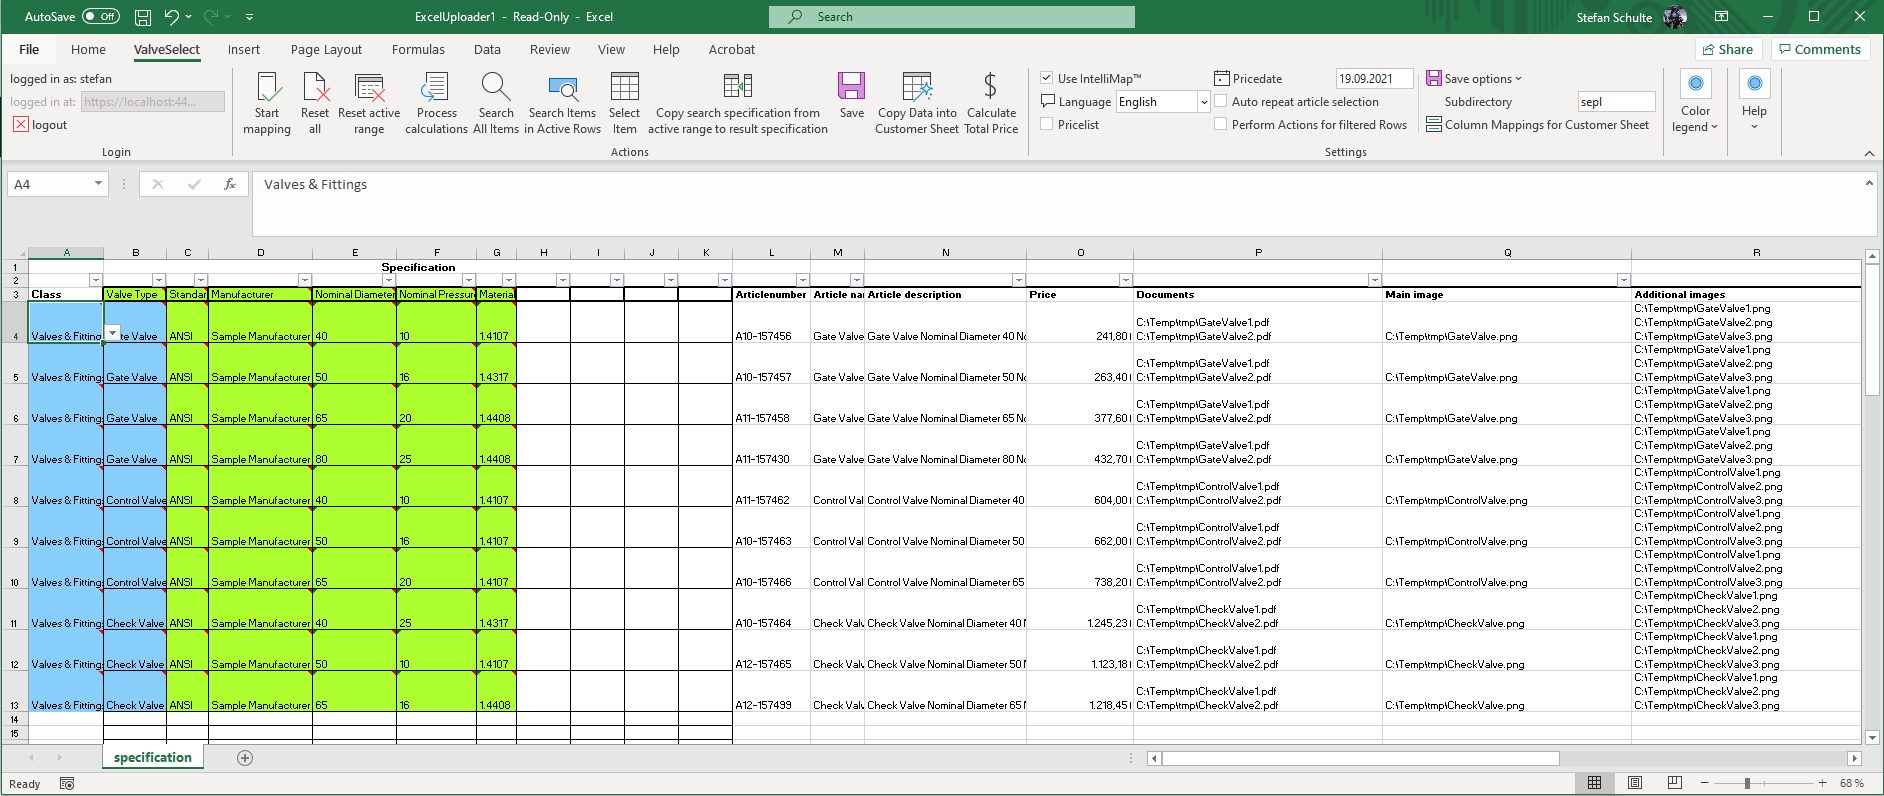
For this example we will provide the following product data sheet to ValveSelect:
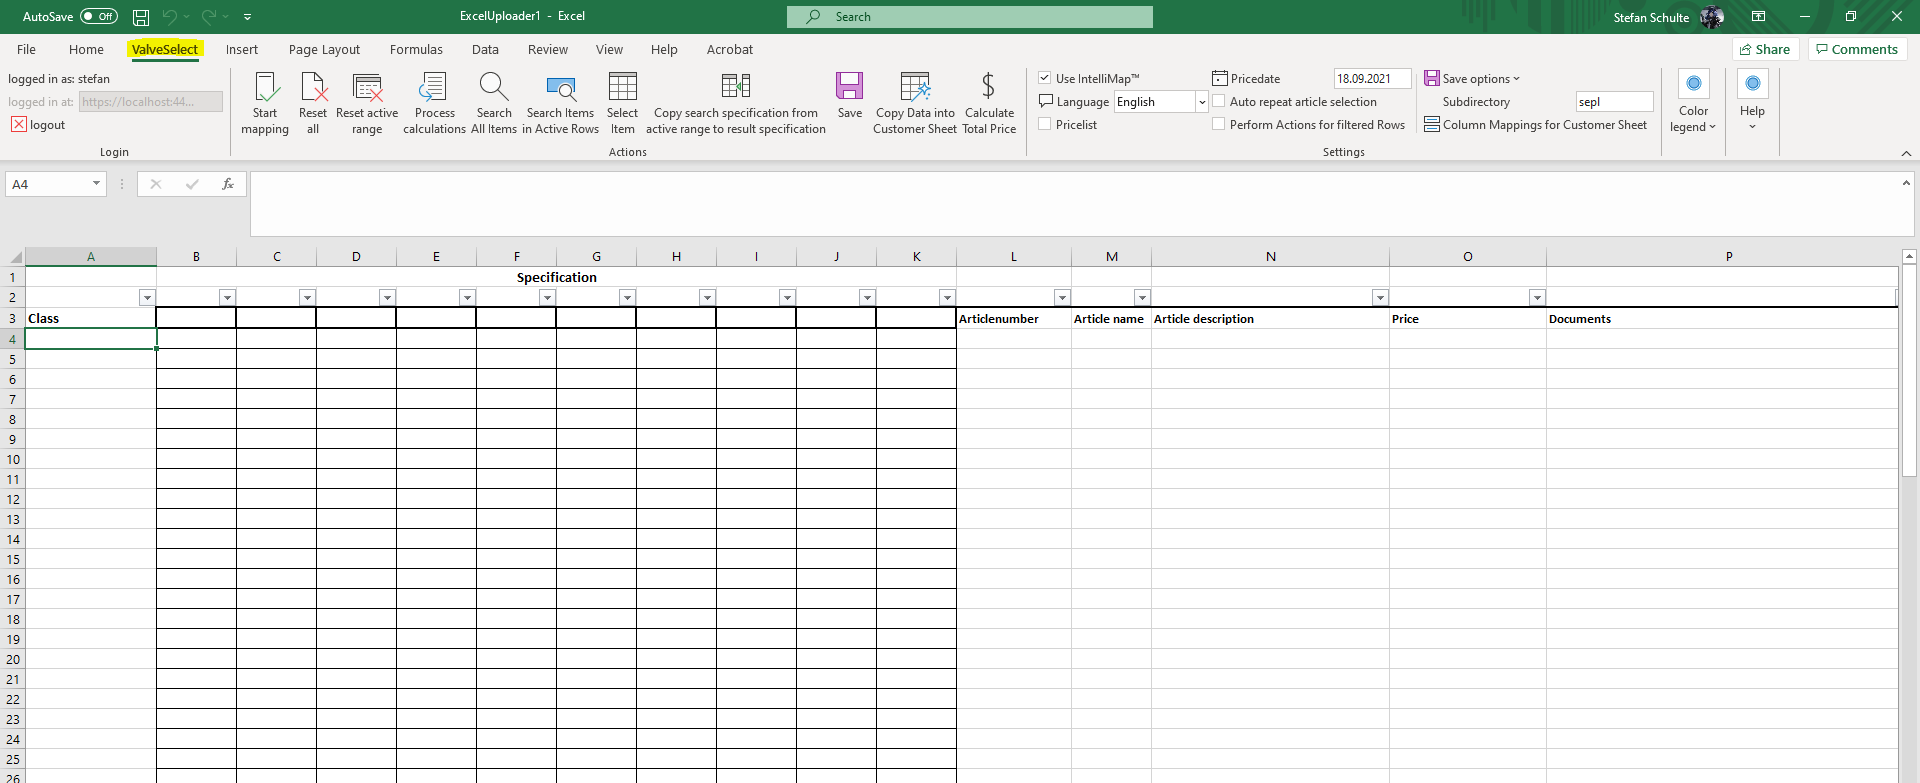
When Opening the Excel Uploader workbook after logging in you will see an empty Excel sheet enhanced with the ValveSelect Excel ribbon:
In the next step you will have to copy the product data from you data sheet to the Excel Uploader sheet performing the following steps:
- Copy your product specification data headers (columns A to G) to line 3 of the Excel Uploader sheet. For the best user experience use the paste option Match Destination Formatting.
- Copy your product data (columns A to G) to line 4 and following of the Excel uploader sheet. For the best user experience use the paste option Match Destination Formatting.
- Copy you product master data (columns H to N) to the columns L and following of the Excel uploader sheet starting a line 4. For the best user experience use the paste option Match Destination Formatting.
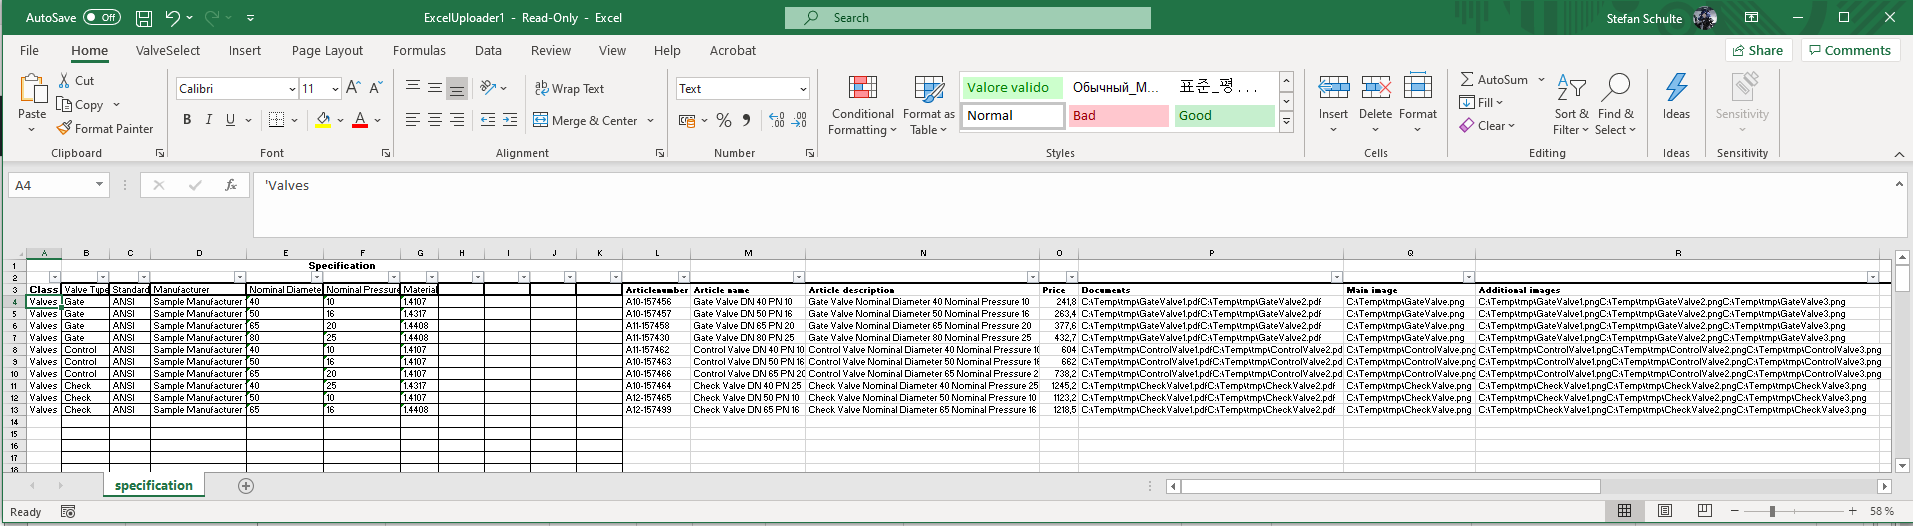
After these steps the Excel Uploader sheet should look like this:
Now please let ValveSelect check your specification info by clicking Start mapping.
After the mapping has finished you will notice, that the ValveSelect add-in changes the background of the specification cells. The green background color indicates that the information is approved for the import to ValveSelect. The light blue color is a hint that your specification data don’t exactly match attributes or attribute values configured in ValveSelect but the mapping algorithm could identify similar attributes or attribute values and that you have to confirm these mappings. For example for the class attribute, you copied the value “Valves” from your base sheet which is not configured in ValveSelect but the mapping algorithm found a similar value “Valves & Fittings” and created a mapping accordingly. Please also check the differences regarding the Valve Type values between the base sheet and the mapping results.
Now please click on the down arrow in cell A4 to confirm the selection. After that a dialog will appear where you can let the mapping function apply your confirmation to all cells with equal mappings.
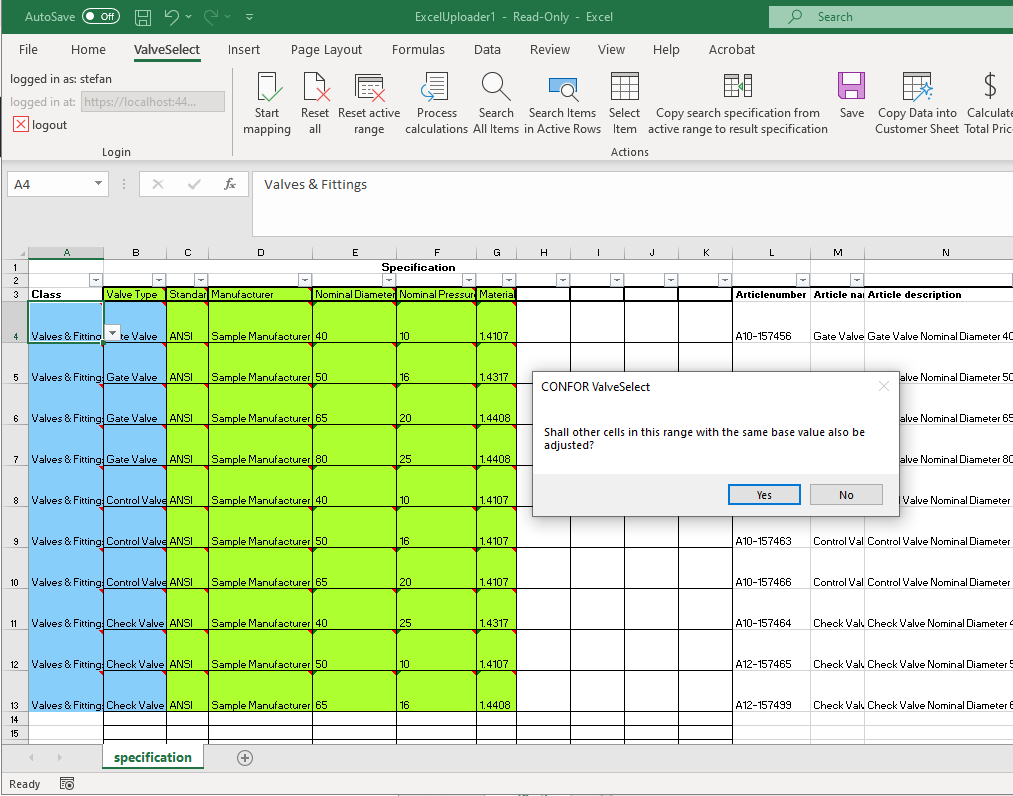
After clicking Yes you will see the whole column A colored with a green background. So you don’t have to confirm the mapping for each row but the mapping function will apply your confirmation to all subsequent rows.
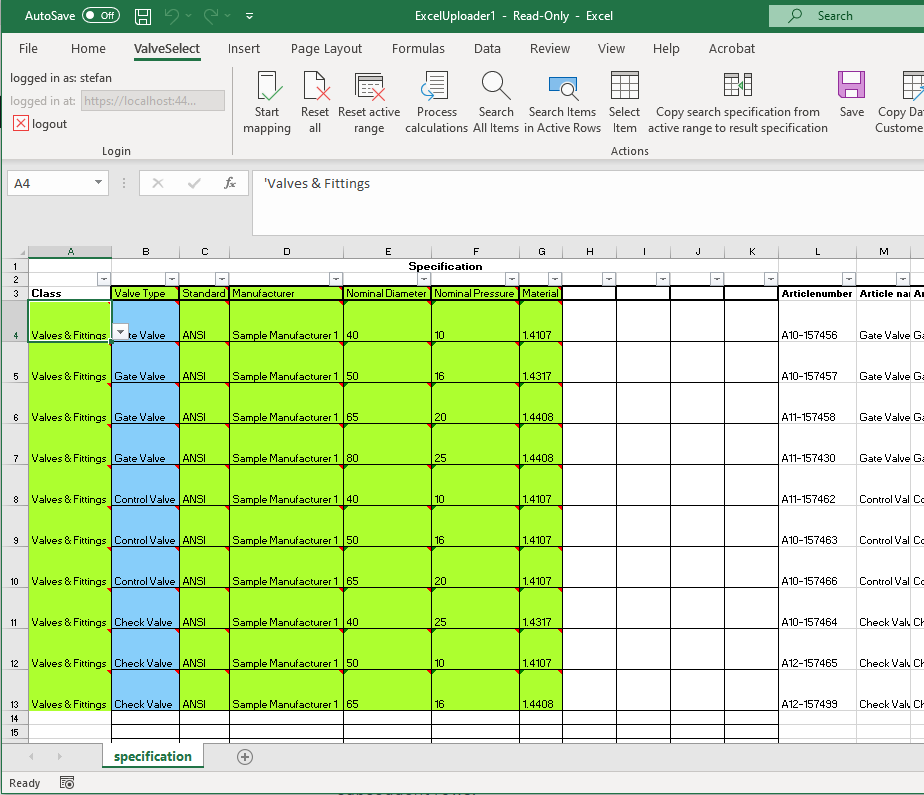
After applying the same procedure to Column B you should end up with all specification cells colored with a green background.

If you want to find out more about the coloring system please click on Color legend on the right of the ValveSelect ribbon.
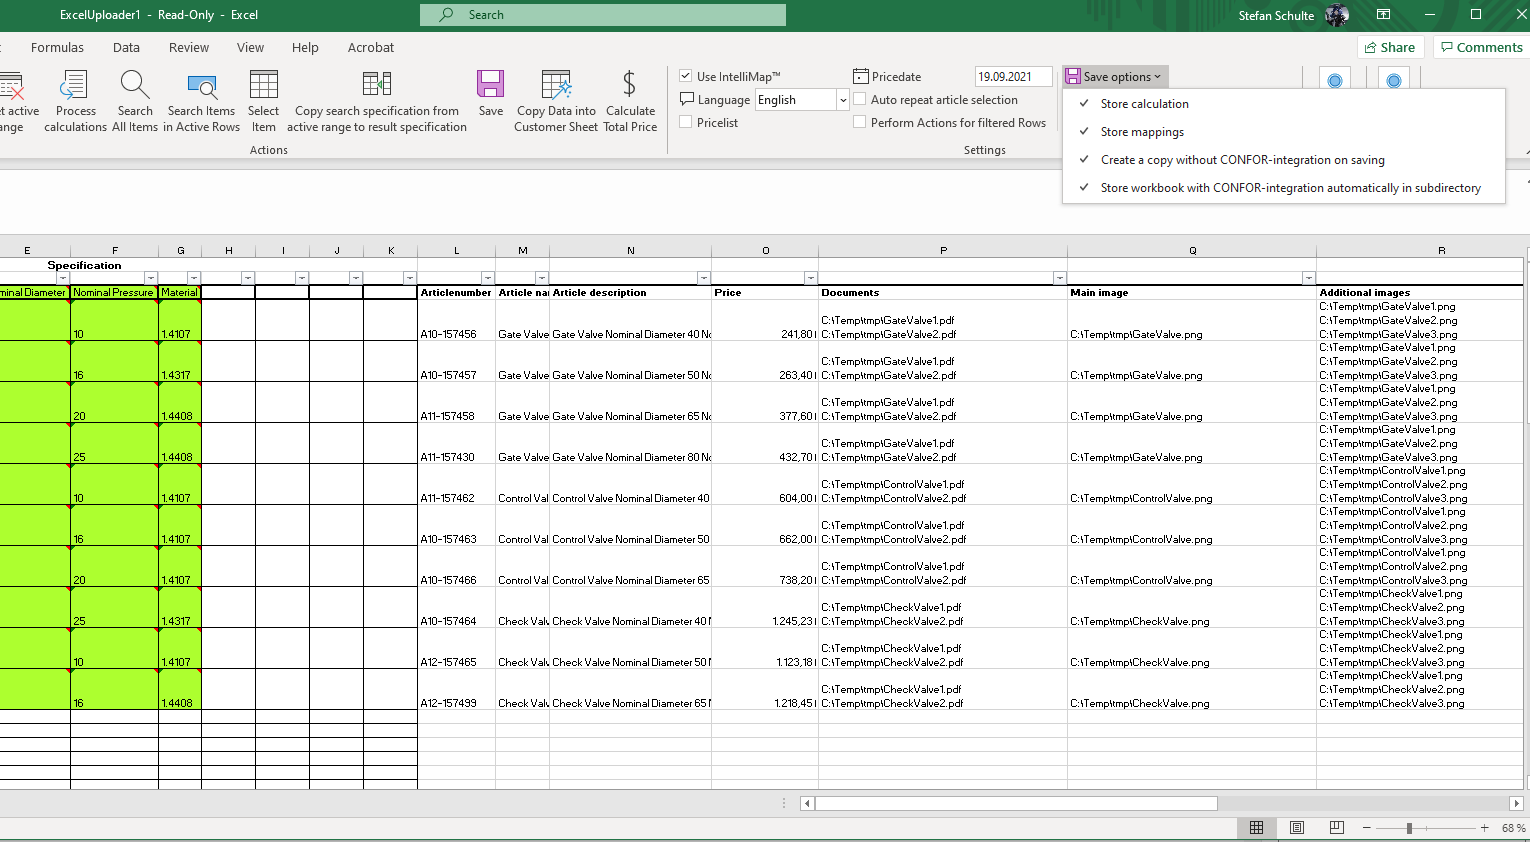
If you choose Store mappings under Save options your confirmed mappings will be stored so that you wont’t have to apply them again with future uploads.
So that’s basically it. Click on Save on the ValveSelect ribbon – please don’t confuse with the native MS Excel Save button – and the add-in will upload your product data including all documents and images.
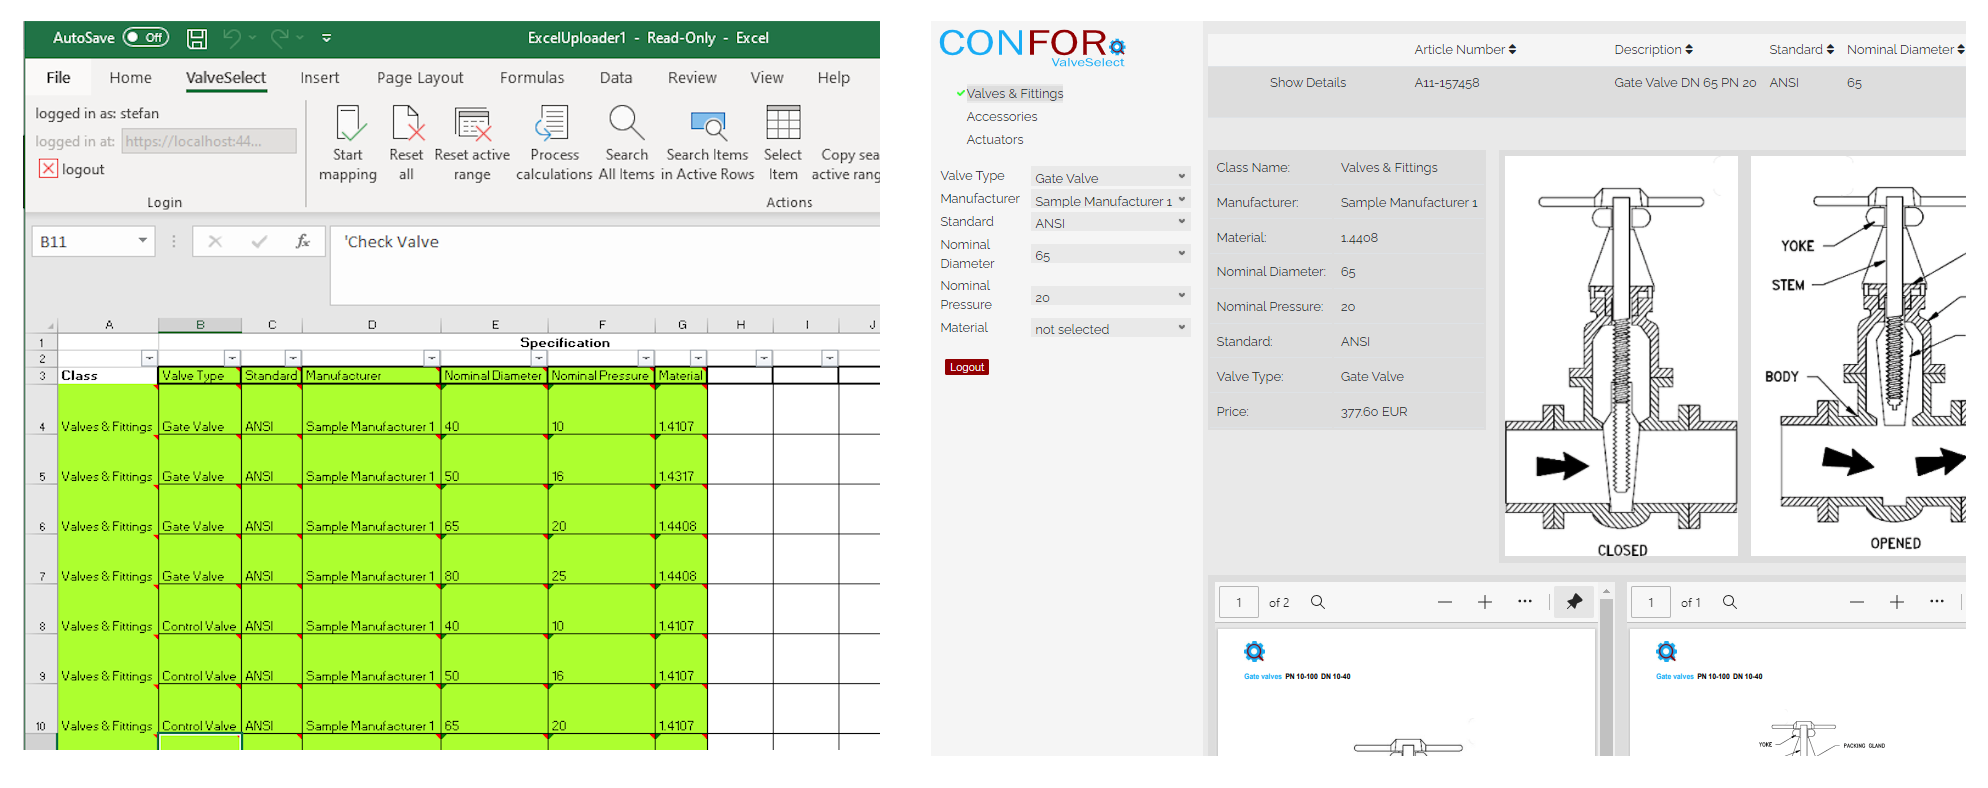
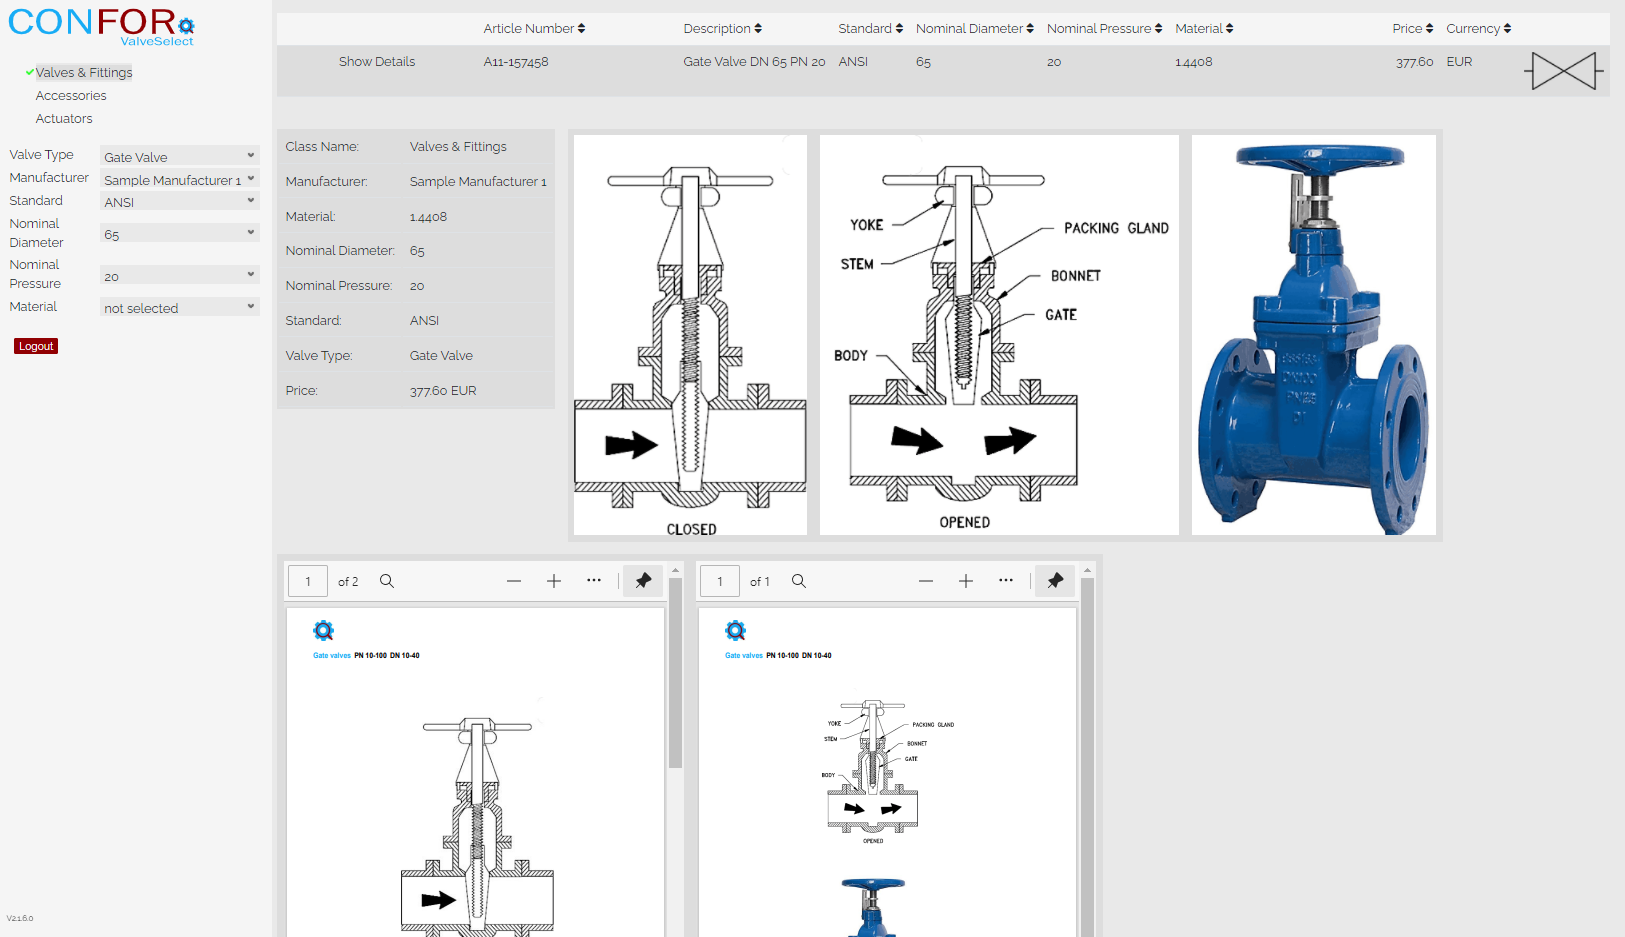
Please check the result leveraging the ValveSelect web frontend:
For more information on ValveSelect please check https://www.cosmer.com/valveselect/.
Thanks for reading – feel free to contact me if you have any questions.